The first thought came after unwrapping the Belkin router or any router is "How to set it up?". The internet is loaded with thousands of user guides. Every router company, as well as each model, wants the unique sequence of steps to be followed. If you are tired of setting up your Belkin router, you can go through these steps. Although, you need an ethernet cable, modem, power supply and a computer to complete the Belkin router setup.
Before I skip to the steps, let's know a little more about the device first.
About Belkin Routers
Belkin is a popular manufacturer that produces several electronic devices including Routers. It is an American based company that is famous for delivering high wi-fi speeds with maximum coverage area through its routers. The wireless standards that come in Belkin routers are 802.11 AC/A/B/G/N. It manufactures its routers with SPA firewall protection and WPA/WPA2 security.
How to Setup Belkin Router?
Before landing on the various steps, you need to know about the Belkin router setup process. These routers have a built-in setup page that works just as well. Belkin routers allow their users to configure advanced settings which are also used to check and modify settings on the router.
1. Establish A Connection Between Belkin Router And Modem
To establish a connection between Belkin router and modem, you need to bring an ethernet cable. It is important to connect both carefully. Thus, you can do so by following the given steps:
Step 1: Bring an ethernet cable to connect modem with the router.
Step 2: Insert one end of the ethernet cable into the Internet port of the Belkin router. Now take the other end and insert it into the modem. Check if these ports are not loosely connected.
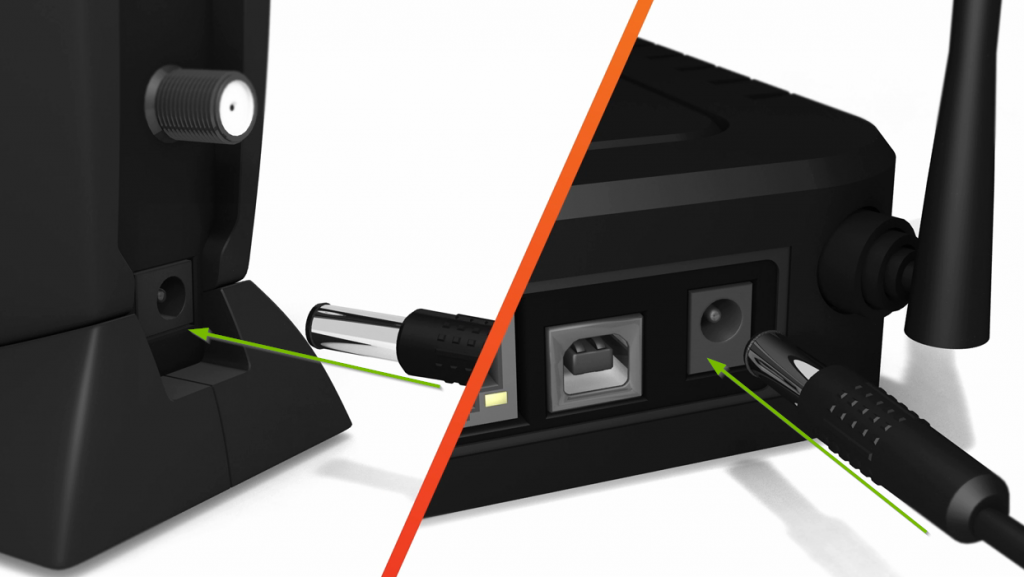
2. Power Your Belkin Router
Most of the routers are adapter based and hence, needed to connect properly. To power on and off the router, you need to follow some sequence of steps which are stated below:
Step 1: Put on your power adapter and insert it into the router's power input port. This port is located at the backside of the router.
Step 2: Now, plug the other end of the adapter into the power source socket.
Step 3: Turn on the button and wait until all the lights start to blink dark green.
3. How to Login Belkin Router
Once you establish a connection between router and modem and power it on, you need to move to the login wizard to complete the Belkin router setup. Visit any browser on your computer and then follow the given steps:
Step 1: Type the given URL into the address bar of your browser or you can hit the given link: http://192.168.2.1/.
The status page will be open. Click on DNS which is given under the Internet WAN section. 
Step 2: It will redirect you to the login page. Enter default login credentials which only includes a password. By default, you should leave it blank.
Step 3: Click on the submit button to proceed further. It will redirect you to the Belkin Router configuration page.
4. Change Belkin Router Login Password
If you are logging into the wizard for the first time, you need to change the login password. Belkin router sets a default password which is kept blank. Thus you need to change it after successfully logged in for the first time. You can change your default login credentials to secure it for the future. Therefore follow these steps to change Belkin Router login credentials.
Step 1: Once you successfully logged in to the Belkin router configuration page. Click on the Advanced Settings menu.
Step 2: Now, click on the System Settings option under the utility section to proceed further.
Step 3: Enter your current password in the first column. Now, enter the new password along with confirming your new password in the second and third columns.
Step 4: Tap on the Save button to finish setting your administrator password.
5. Change Belkin Router SSID
The name of the router network visible to other wireless devices is known as the SSID. This SSID helps to find a unique network while searching for a router on your smartphone or computer. To change Belkin Router SSID, follow these steps:
Step 1: After successfully logged in to your Belkin router setup. Navigate to the Wireless Settings on the left side of the window.
Step 2: You will find Wireless Network Name (SSID) under Wireless Settings. The default name should be visible as Belkin along with the model name. Tap on the name to initiate any changes.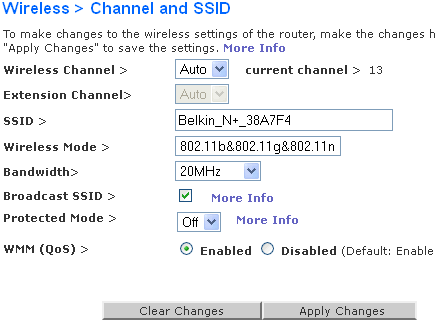
Step 3: Type any new SSID name of your choice. Click on the Save button to apply the changes.
6. Change Belkin Wi-Fi Password
To limit your Wi-Fi connection up to the authenticated users, you need to secure it with a valid password. Follow these steps to make such changes:
Step 1: Go to the Wireless under settings and then go to the Security window.
Step 2: There are four different protocols you can choose to configure security. Select WPA/WPA2 or WPA2 to secure your network. Now, under PSK, type your password and retype it. 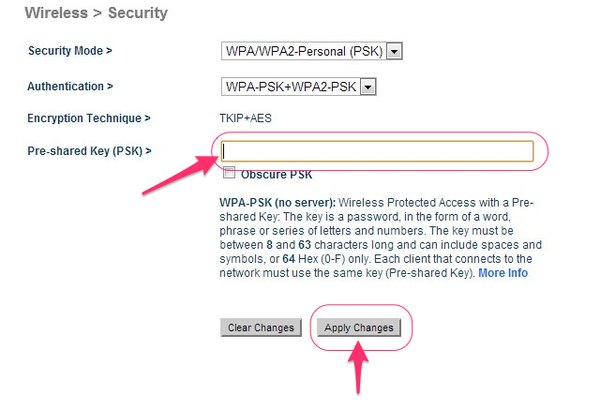
Step 3: Click on the Apply Changes to save the changes you made.
Also Read: 192.168.1.1 Login: Setup Your Wireless Router
The Bottom Line
These all are the steps you can try to configure & complete the Belkin Router setup. All the above-discussed steps are tested and are working effectively. You can apply these steps in the given sequence and set up your Belkin router. You can ask us through the comments section if you have any doubts while getting stuck at any step.
Cheers!


