Windows errors have different levels of threats, but that is when you are able to boot in. Usually, BSODs are such errors that prevent you from doing that. However, there are some errors, that won't even let BSODs to show up.
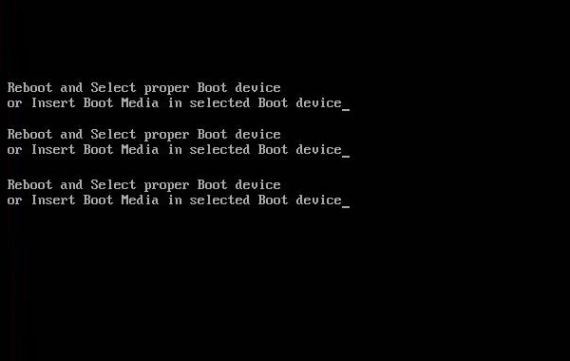
The "Reboot and Select Proper Boot Device" is one such issue. This is something, you can expect when your PC fails to load Windows. Now, this could be a software or a hardware issue. But whichever it is, you won't be able to use your PC, without solving this error.
This is why, In this article, I will tell you how to deal with such a situation and Fix Reboot and Select Power Boot Device error.
What is "Reboot and Select Proper Boot Device"?
As you can guess, the error "Reboot and Select Proper Boot Device" is caused when your PC is booting Windows from the wrong device. This wrong device could be another storage device or maybe a misconfigured one.
If you consider the causes of this error, there aren't many. But the possible ones in the simplest word possible are-
- Faulty HardDisk
- Partition not active
- Misconfiguration in BIOS
So what happens is, every time you boot your PC, your BIOS runs a test called Power-On Self Test. This test basically checks whether all your hardware is running or not. After this, your PC boots your installed OS by accessing the drive which has the OS installed. Usually, it is your C Drive, but it depends on how you configure it while installing the OS.
But the error was caused when your System was not able to find the drive or the source of OS. Due to which, your computer is unable to run the OS or Windows and you get a startup error. So, If your device is in the warranty period, feel free to claim it
That being said, the question is how to get your computer as it was before.
How to Fix "Reboot and Select Proper Boot Device" error?
1. Check Hardware
Note- This method is for Desktop users specially.
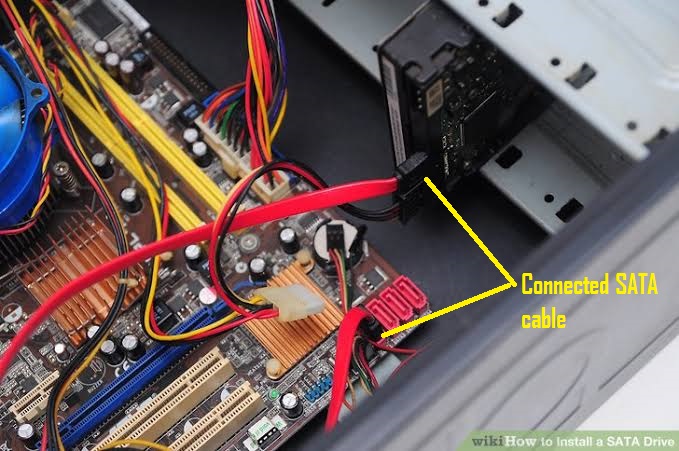
Since this error is related to system storage, there is a possibility that your PC was unable to access your HardDisk. Well, this could either mean that your Hard Disk is done for or maybe it's a loose SATA cable.
So, if you own a desktop. Turn off your device, open your side panel and ensure that the SATA connection is secure. It is the wire that goes from your Motherboard to your Hard Disk. You can also unplug it, clean and then plug it again. Please do the same with your RAM sticks as well.
Do not remove the wire going to your Power supply.
2. Cross-Check Boot Order
Well if your PC, was running fine a day or two before, your BOOT order should be fine. However, that doesn't take the possibility that it could be misconfigured.
What is Boot Order?
The boot order is a sequence in which your computer searches for OS in different partitions or different storage drives. If misconfigured, your PC might not be able to find the proper source of the OS and you will get the given error.
To change the Boot Order, you will have to access it through the CMOS setup in the BIOS.
- First, Reboot/Restart your PC.

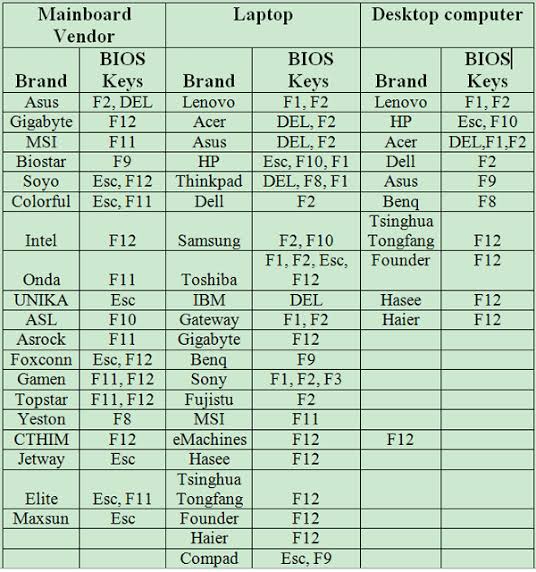
- As you get the Boot screen, press the key necessary to access the BIOS. Usually, its either Del or F12, but it varies with the manufactures as well.
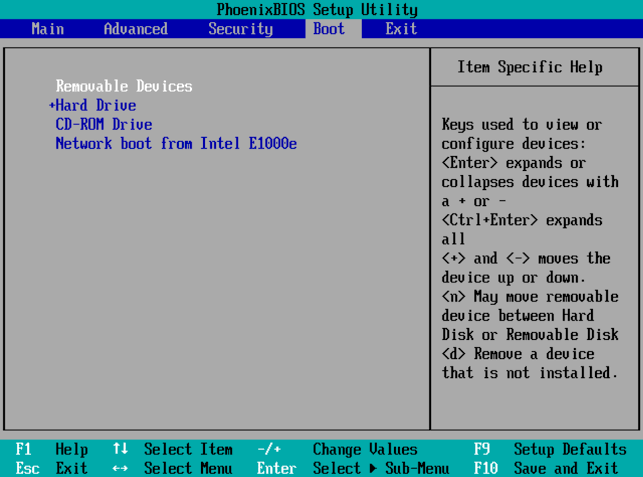
- Now, scroll to the Boot Tab, and check your Boot Sequence. Make sure that your Hard Disk is on the top of the list.
- Restart your PC again and check if the problem persists.
3. Enable UEFI only
In every PC, desktop or laptop, BIOS is installed. It is a low-level software, which basically ensures that your PC boots properly. But, BIOS is old software, instead of which UEFI is now being used. UEFI does exactly what BIOS does, but its better, safer and reliable. So, if you have a new machine or maybe a year or two old, with UEFI, having Legacy mode activated could cause this issue.
So, in order to disable Legacy mode,
- Access, the BIOS/UEFI menu like you did before.
- Now locate the Legacy option and Disable it.
- Then, save your Setting and Exit.
- Reboot your PC and see if the problem persists.
4. Reset Primary Partition
Assuming that the problem is still not solved, here is the last thing you can do, before going to a repair shop. As there still remains the possibility that somehow, your primary partition is changed.
Your primary partition is the one that has the OS or Windows installed. If it is somehow changed, your PC will try to boot from a partition that has no OS and you will get an error.
To reset that, you will need a bootable drive. It is an external storage device that has Windows setup on it.
- First, Reboot your PC and insert the Bootable drive.
- On the installation screen, click on Repair your computer on the left bottom corner of the screen.
- Now navigate through Choose an Option-> Troubleshoot-> Advanced Settings -> Command Prompt.
- In the Command Prompt, type the following-
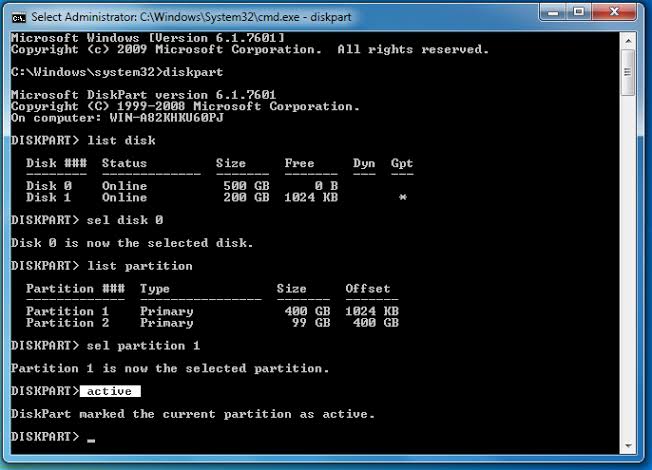
- diskpart and press Enter.
- list disk and press Enter. (This will show all the HDD installed on your PC).
- select disk 0 and press Enter. (Disk 0 is usually the HDD on which the Windows is installed).
- list partition and press Enter. (This will show all the partition made on your HDD).
- select partition 1 and press Enter. ( Here, partition 1 is your Primary partition on which Windows is usually installed)
- active and press Enter again. This will make partition 1 in disk 0 your primary partition.
- Now exit and Restart your PC. Use the image below as a reference.
Also Read: How to Fix Undoing Changes Made to Your Computer?
In the end
There is nothing much to say, except that if these fixes do not resolve the problem, then your Hard Drive might not be functional anymore. The best course of action at this point will be taking your computer to a repair shop.
With that being said, do keep in mind that it is not much you can do in situations like this. If it was a BSOD, it would have been easier. But, if these fixes solved the issue, congratulation.
At last, Thanks for your time. I hope this article helpful.
Thank you, and God Bless!


